Kali Linux comes with Iceweasel (Firefox) as an installed browser. For some reason, the producers of Kali Linux missed one thing, the vital Adobe Flash Player plugin.
This simple tutorial will show you how to get Adobe Flash Player in Kali Linux’s Iceweasel. There are two different methods to do this. Try method #1 first, as it is very easy. If, for some reason, that method doesn’t work, then move on to method #2.
Method #1: Automatic Install
Open a Terminal in Kali Linux and type this command:
apt-get install flashplugin-nonfree
When it finishes installing and you are presented with the root@kali prefix again, type this command and press Enter:
update-flashplugin-nonfree –install
You can go here in Iceweasel to test Flash Player. If you see the little animation, then you’re good to go!
If you don’t see the flash animation, then continue on to Method #2.
Method #2: Manual Install
Step One:
Start Kali, login to root, open Iceweasel, and go to http://get.adobe.com/flashplayer/.
Step Two*:
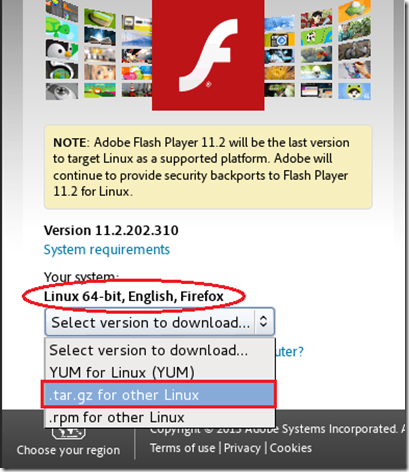
When Adobe.com opens, it should already have detected what version you need (Mine is Linux 64-bit Firefox). So all you need to do is click on the drop down menu that says Select version to download… and select .tar.gz for other Linux from the list.
Now hit the download button
*Note, Adobe is constantly changing their website, I’ll do my best to keep up with these changes, but your experience may still be a little different than my pictures.
Thank you for understanding!
Step Three:
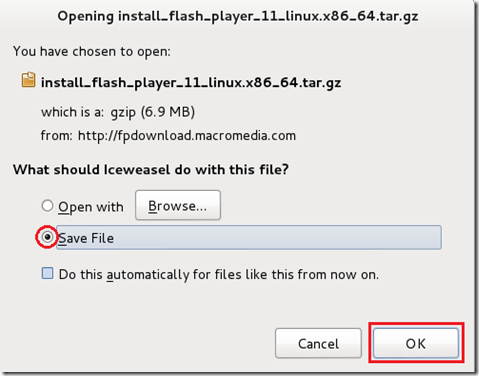
The download window will now open, and Iceweasel will ask you want you want it to do with the file, select Save file… and hit OK.
If Firefox asks you where to save the file too, select the root folder and hit OK.
When it has finished downloading, close Iceweasel.
Step Four:
Open a Terminal, type ls and hit Enter. Kali will then display all the folders/files in your root folder, the adobe flash player .tar.gz folder should be among them.![4_thumb[1] 4_thumb[1]](http://lh3.ggpht.com/-f_Ep_9AxCl4/UmpaTHgkfxI/AAAAAAAAAgo/T9ihpCEJFAs/4_thumb%25255B1%25255D_thumb.png?imgmax=800)
Step Five:
Now that we know the name of the Adobe Flash Player folder, we need to unzip it. Start by copying the name of the Adobe Flash Player folder.![5_thumb[1] 5_thumb[1]](http://lh3.ggpht.com/-_6F0MIeTVH4/UmpaT1GdcjI/AAAAAAAAAg4/qOwIm4gJpCg/5_thumb%25255B1%25255D_thumb.png?imgmax=800)
Now type tar –xf and paste the name of the Adobe Flash Player folder. See example below:
Example: tar –xf install_flash_player_11_linux.x86_64.tar.gz
The name of your Adobe Flash Player folder might be different then mine, so don’t try to copy mine!
The complete command should look similar to this photo:![5.5_thumb[1] 5.5_thumb[1]](http://lh5.ggpht.com/-uc8IjfdYYCY/UmpaU5Ibi2I/AAAAAAAAAhI/kXIBt-_7Qzg/5.5_thumb%25255B1%25255D_thumb.png?imgmax=800)
Hit Enter
Step Six:
Kali should take a couple of seconds to unzip the folder. After it’s complete type this command: mv libflashplayer.so /usr/lib/mozilla/plugins/ and hit Enter.![]()
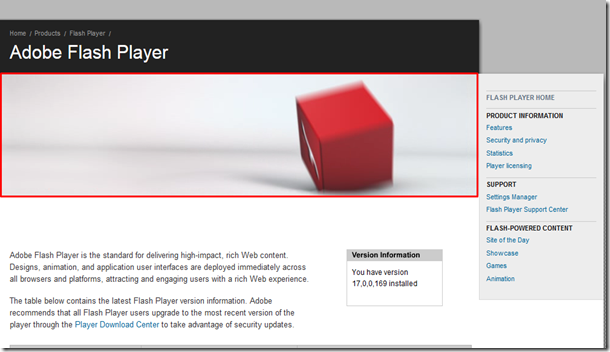
Kali Linux will do the rest, Adobe Flash Player has now been installed! To test your Flash installation, go to this URL in Iceweasel: http://www.adobe.com/software/flash/about/, if you see the little flash animation, then you are done! You can also delete all the Flash Player folders/files in your root folder, they’re not important.
Thank you for using our tutorial,
Enjoy Kali Linux!

Comments
Post a Comment